Preface
- This guide applies to Ubuntu/Debian systems
- All commands are executed as the root user by default
- Make sure the server can access the public internet
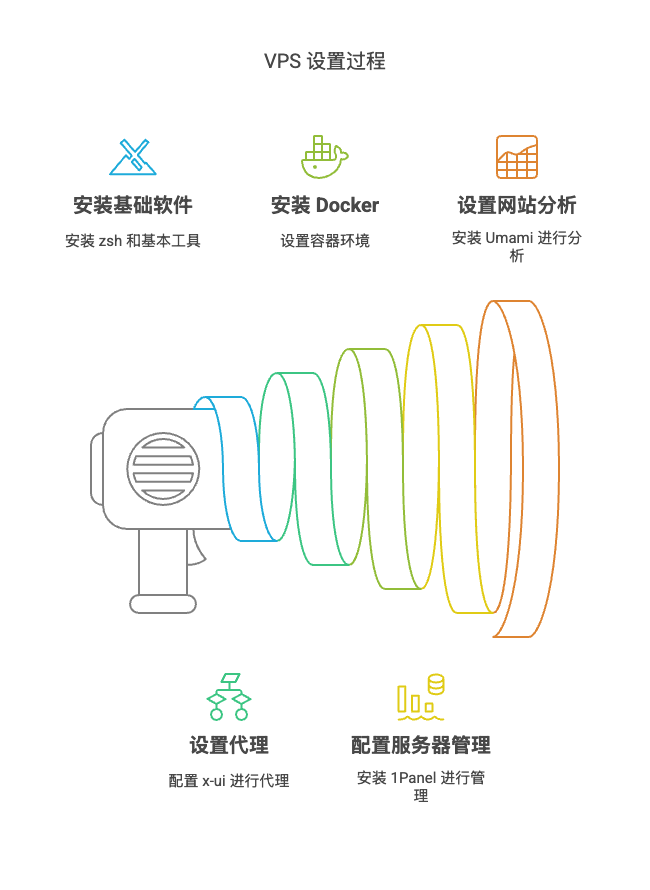
Software Installation
1. Basic Environment Setup
zsh & oh my zsh
- Install zsh and set it as the default shell
sudo apt update
sudo apt install zsh- Install curl and git
apt install curl -y
apt install git -y- Install Oh My Zsh
sh -c "$(curl -fsSL https://raw.githubusercontent.com/ohmyzsh/ohmyzsh/master/tools/install.sh)"- Configure the ~/.zshrc file
# The config file lives at ~/.zshrc; edit it to set the theme and plugins
# Common settings:
# Set the theme
ZSH_THEME="agnoster"
# Set the plugins
plugins=(git docker)
2. Server Proxy
x-ui
- Run the one-click installation script
bash <(curl -Ls https://raw.githubusercontent.com/vaxilu/x-ui/master/install.sh)-
Access the admin panel Open in a browser:
http://<server-ip>:<port>Example:http://192.168.1.1:10000 -
Update V2Ray to the latest version The system will restart automatically after the update completes
-
Configure a vmess node
-
Install a V2Ray client V2rayN is recommended; it supports connecting by scanning a QR code or importing a config file
3. Container Environment
docker & docker-compose
Security tips:
- Avoid using the latest tag
- Update images regularly
- Pay attention to container permission settings
- Install the required dependencies
apt install apt-transport-https ca-certificates curl software-properties-common -y- Add the official Docker repository
sudo add-apt-repository "deb [arch=amd64] https://download.docker.com/linux/ubuntu $(lsb_release -cs) stable"- Update the package index
apt update- Install Docker CE
apt install docker-ce -y- Verify the Docker installation
docker --version- Install docker-compose
curl -L "https://github.com/docker/compose/releases/download/1.29.2/docker-compose-$(uname -s)-$(uname -m)" -o /usr/local/bin/docker-compose- Make docker-compose executable
chmod +x /usr/local/bin/docker-compose- Verify the docker-compose installation
docker-compose --version4. Server Management
1Panel
- Run the one-click installation script
curl -sSL https://resource.1panel.hk/quick_start.sh -o quick_start.sh && bash quick_start.sh- During installation you will be asked to set the following:
- Installation directory (default: /opt)
- Panel access port (default: 30840)
- Secure entrance (a custom one is recommended)
- Panel username (a custom one is recommended)
- Panel password (a strong password is recommended)
After a successful installation, you will see log output like this
[1Panel Log]:
======================= Starting Installation =======================
Set 1Panel installation directory (default is /opt):
[1Panel Log]: The installation path you selected is /opt

The port you set is:  30840
Set 1Panel secure entrance (default is xxxxxxx):
Set 1Panel panel user (default is xxxxxx):
Set 1Panel panel password,xxxxxxx
You can access the panel at:
http://<server-ip>:30840Notes:
- Keep the login information shown during installation safe
- Make sure the port you set is open in the firewall
- Configuring an SSL certificate is recommended for secure access
5. Website Analytics
Umami
Prerequisites:
- Docker and Docker Compose are already installed
- A domain name is ready and its DNS record resolves to the server IP
- Create a project directory
mkdir umami
cd umami- Create a docker-compose.yml file
version: "3"
services:
  umami:
    image: ghcr.io/umami-software/umami:postgresql-latest
    ports:
      - "3000:3000"
    environment:
      DATABASE_URL: postgresql://umami:umami@db:5432/umami
      DATABASE_TYPE: postgresql
      APP_SECRET: replace-me-with-a-random-string
      NEXTAUTH_URL: https://your-domain.com # Replace with your domain
    depends_on:
      db:
        condition: service_healthy
    init: true
    restart: always
    healthcheck:
      test: ["CMD-SHELL", "curl http://localhost:3000/api/heartbeat"]
      interval: 5s
      timeout: 5s
      retries: 5
  db:
    image: postgres:15-alpine
    environment:
      POSTGRES_DB: umami
      POSTGRES_USER: umami
      POSTGRES_PASSWORD: umami
    volumes:
      - umami-db-data:/var/lib/postgresql/data
    restart: always
    healthcheck:
      test: ["CMD-SHELL", "pg_isready -U $${POSTGRES_USER} -d $${POSTGRES_DB}"]
      interval: 5s
      timeout: 5s
      retries: 5
volumes:
umami-db-data:- Start the services
docker-compose up -d- Access and configure
- Access URL:
https://your-domain.com - Default account:
admin - Default password:
umami
Important configuration notes:
- You must change the default admin password
- Changing the database password (POSTGRES_PASSWORD) is recommended
- Set a random APP_SECRET value
- Configure an SSL certificate for HTTPS access
Usage:
- Log in and create a website
- Get the tracking code
- Add the tracking code to the websites you want to track
References
- https://www.youtube.com/watch?v=SpxTFes1B8U
- https://hostalk.net/posts/vpstest_script.html
- https://github.com/awesome-selfhosted/awesome-selfhosted
- https://openalternative.co/
Follow the WeChat official account Tech Backyard (技术后花园) for more information