Overview
This post introduces how to build a free image hosting service with CloudFlare Workers, solving image storage and management for a blog. Combined with PicGo and an Obsidian image upload plugin, it streamlines the image handling workflow. Third-party platforms involved
- CloudFlare: a cloud service platform. We use its Worker capability to power the image hosting service.
- Github: a source code hosting platform. The code behind the worker is hosted here. New features or bug fixes require updating the code here.
- Telegraph: the platform where images are actually stored. It only provides an upload API; a delete API has not been developed yet.
Core Workflow
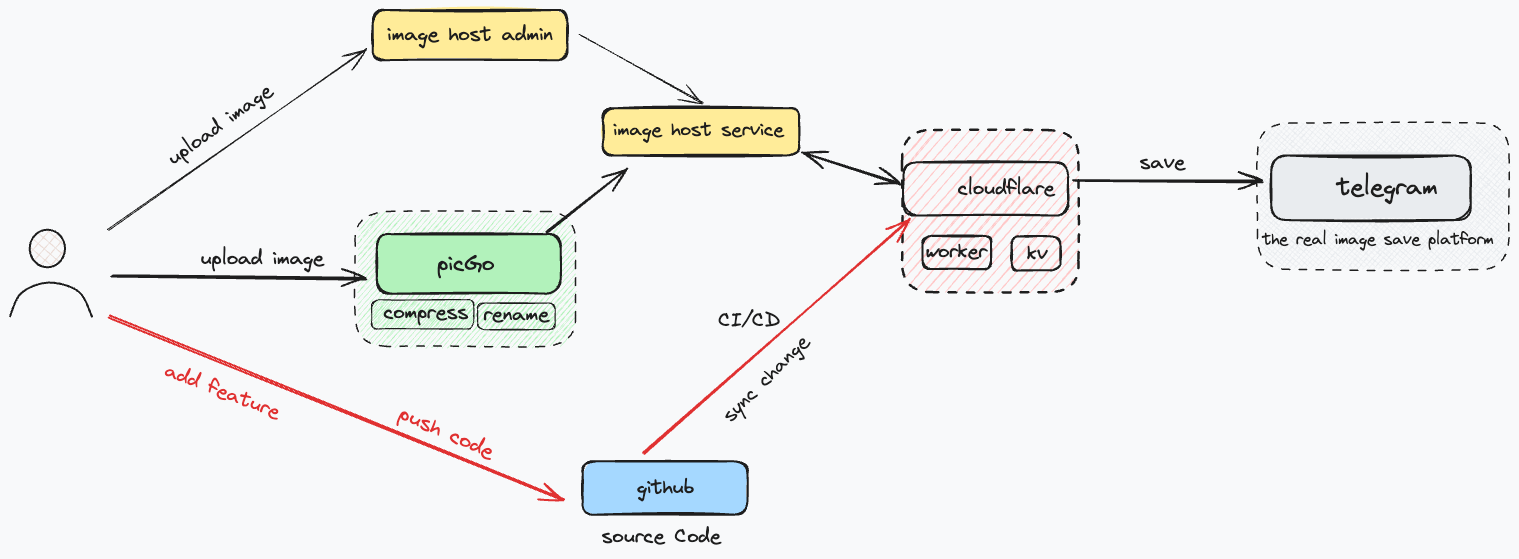 Basic features of a self-hosted image service
- Image upload, with two upload methods: upload via a web page and upload via the PicGo client
- Image management, including deletion, blocking, image review, etc.
- PicGo client support — with PicGo plugins, images can be compressed to reduce file size.
Limitations of the image hosting service
- Image size: 5 MB max
- Free quota limits
- Upload/delete operations < 1000 times/day. You can think of it as at most 1000 writes per day.
- Image displays < 100000 times/day. You can think of it as at most 100,000 image requests per day. If CloudFlare caching is enabled, cache-hit requests do not count against the quota.
- If the free quota is used up, it is recommended to subscribe to the CloudFlare Workers paid plan, $5 per month.
Self-Hosting Process
There are two versions of the self-hosting process: basic and pro. The basic version is usable and simple to set up — it can be done in 10 minutes. The pro version is relatively more complex and takes about 2 hours; if you get stuck somewhere along the way, the time can balloon significantly. Pro has richer features and a higher degree of customization.
| feature | basic | pro |
|---|---|---|
| Image upload | ✅ | ✅ |
| Copy image URL | ✅ | ✅ |
| Image viewing | ✅ | ✅ |
| Admin panel | [x] | ✅ |
| Custom domain | [x] | ✅ |
| Image management | [x] | ✅ |
| Image upload client | [x] | ✅ |
| Image compression | [x] | ✅ |
| Batch upload | [x] | ✅ |
| Image renaming | [x] | ✅ |
| Image review | [x] | ✅ |
| Obsidian auto upload | [x] | ✅ |
Choose the version that fits your needs.
Basic Version Setup
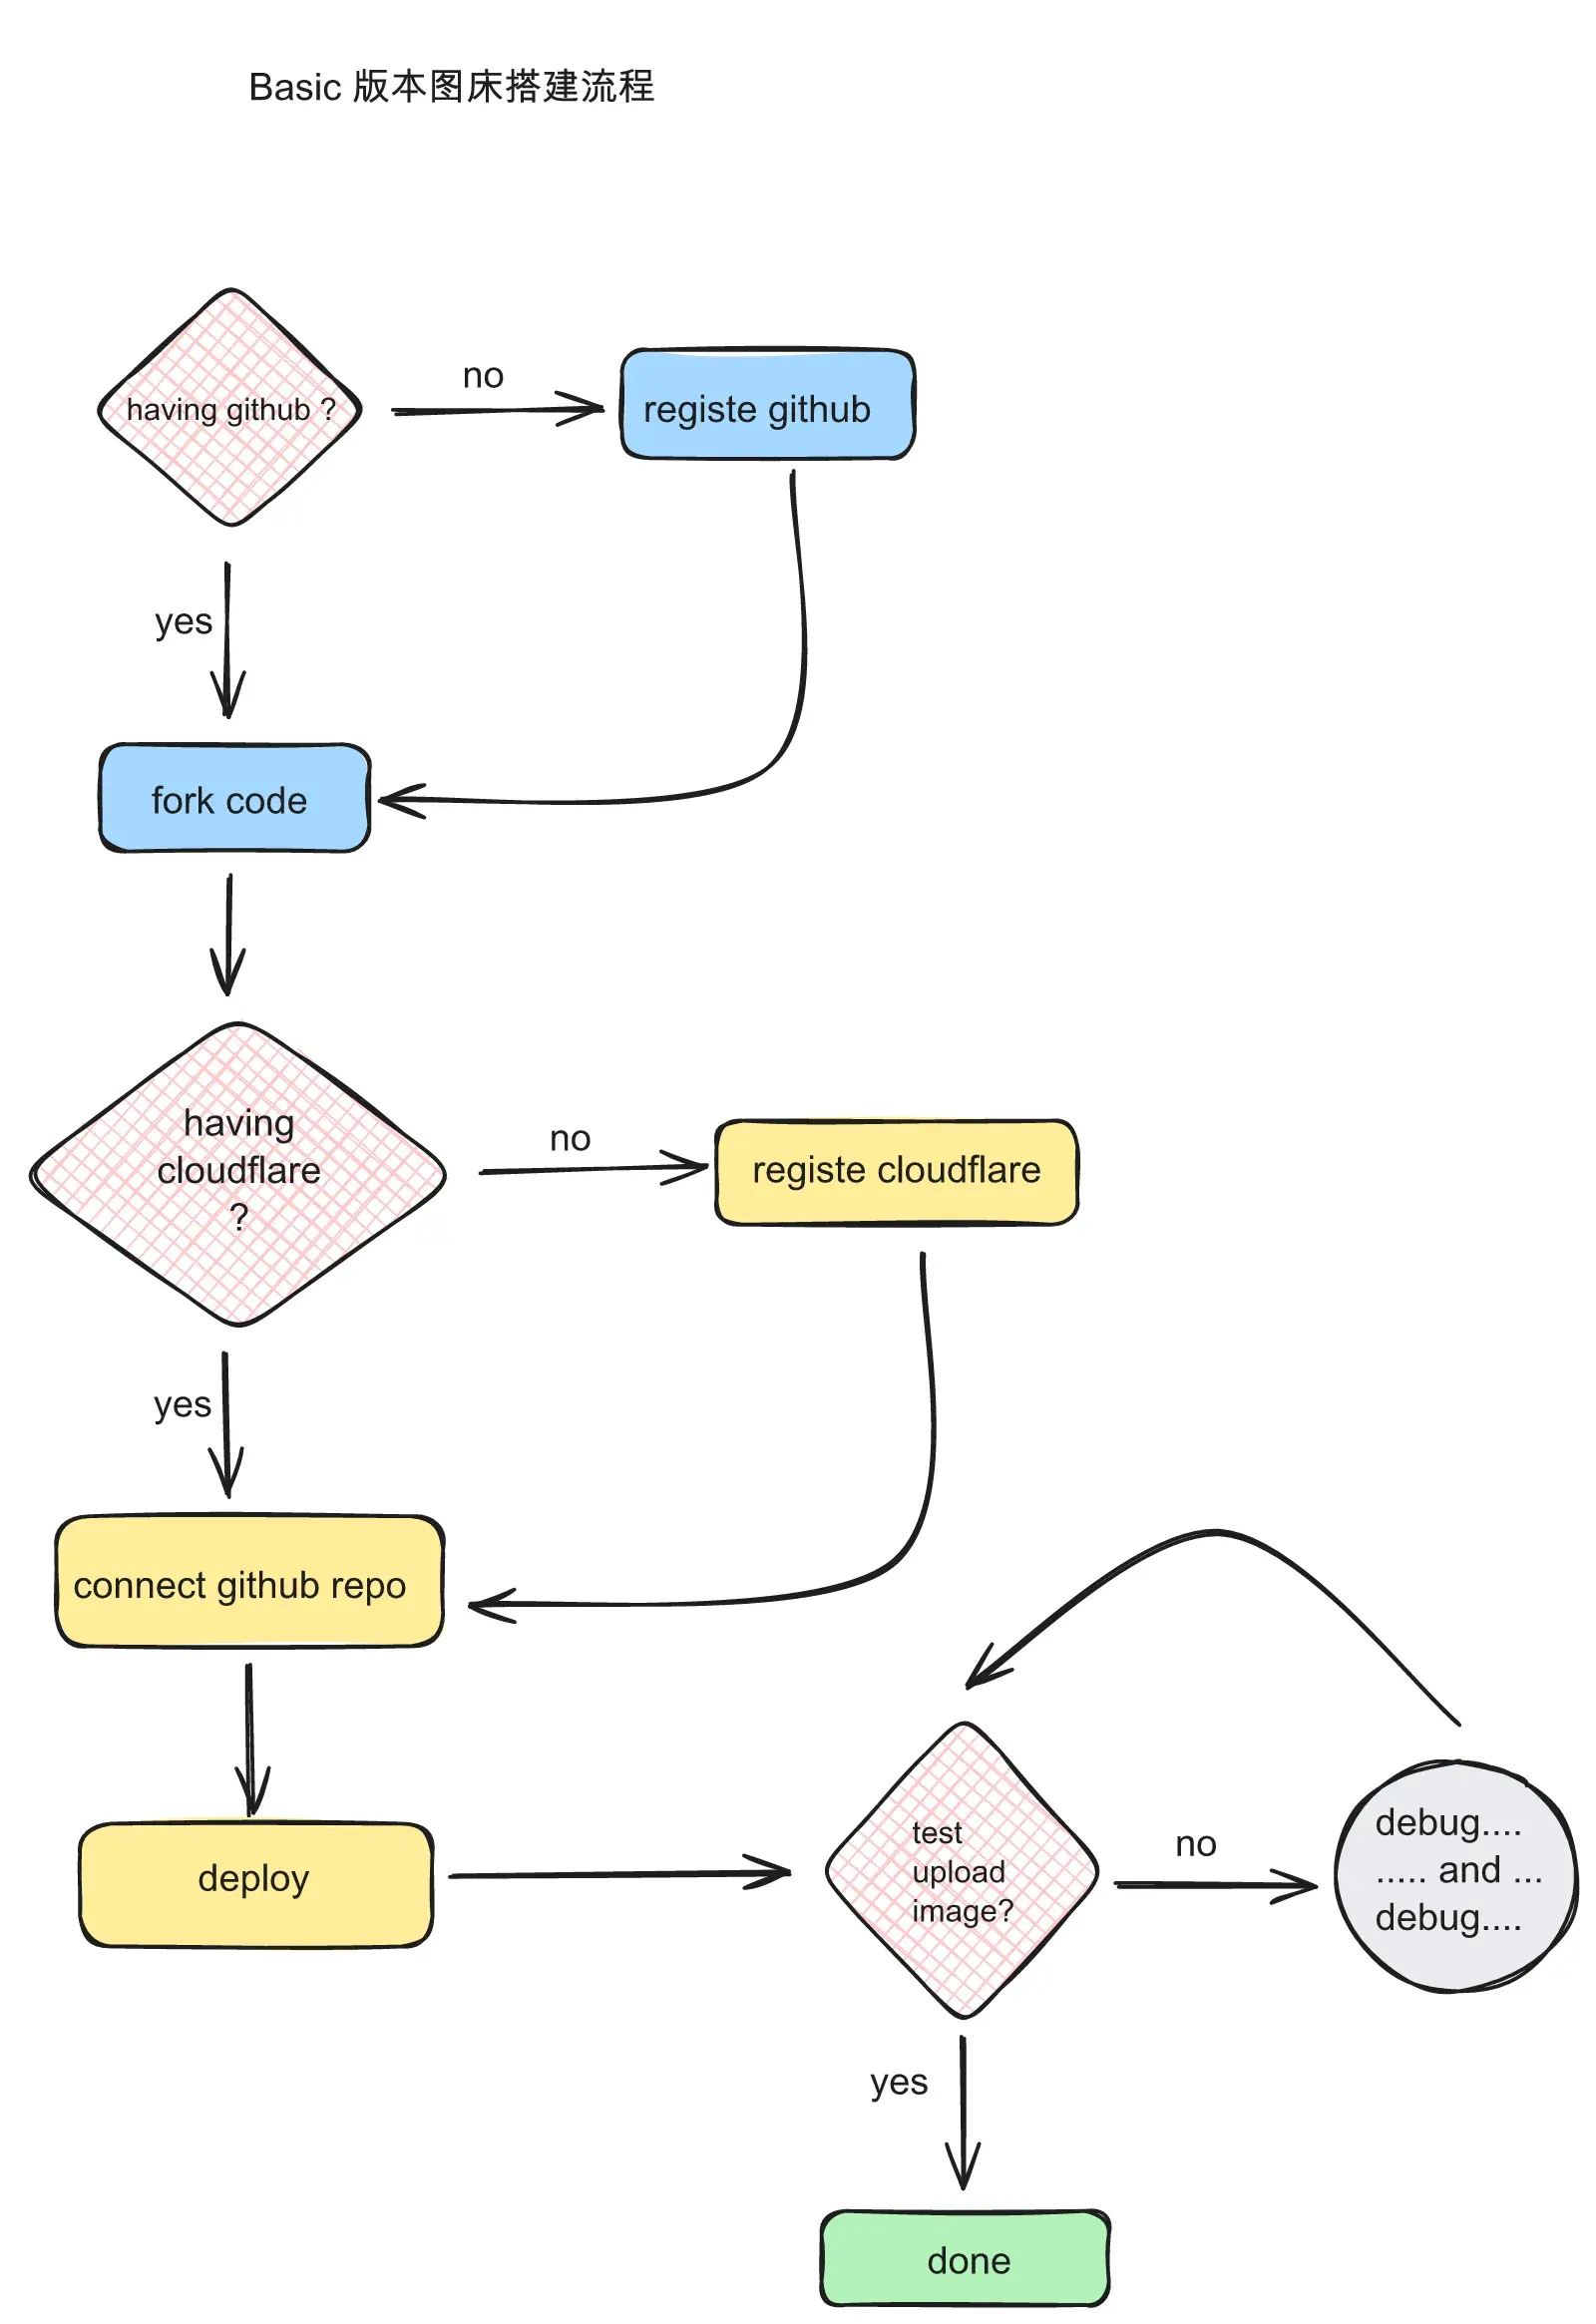
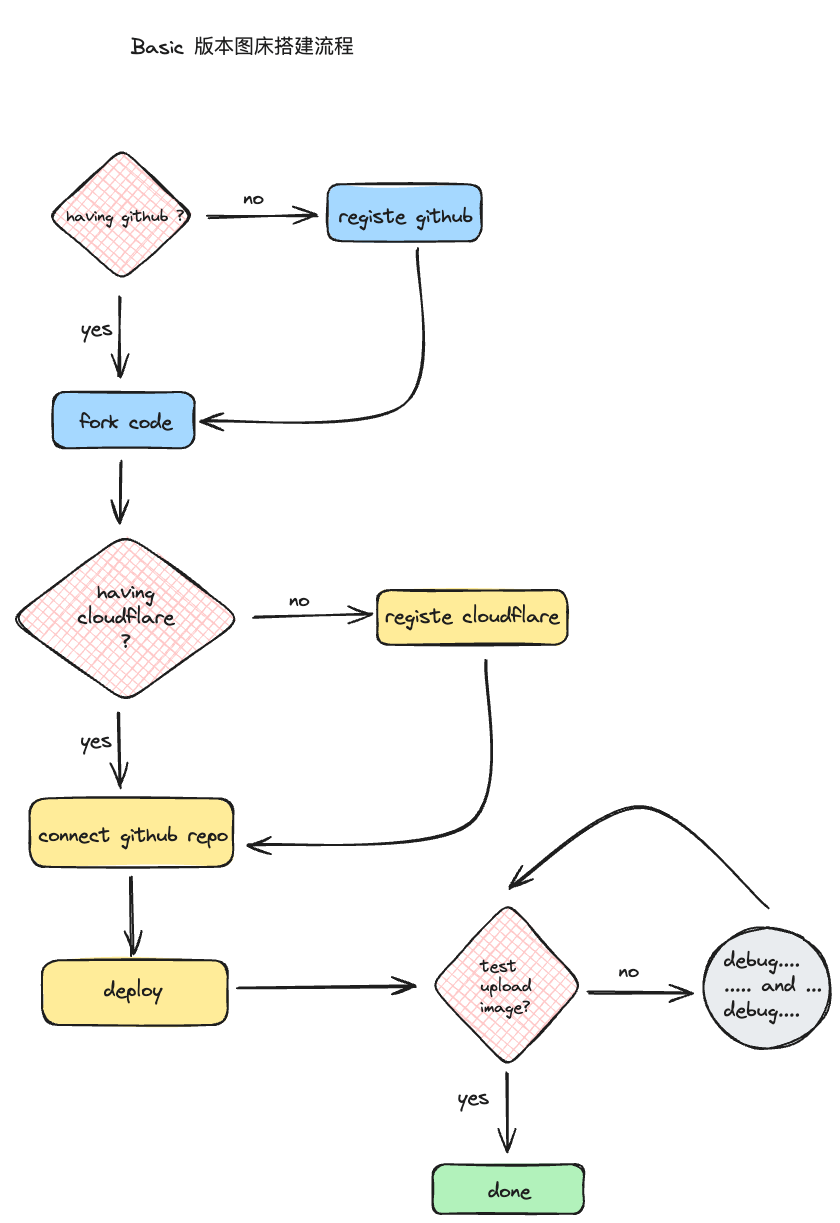
Fork the Code
- Fork the repository telegraph-image. You can also choose the version maintained by the original author: origin telegraph-image
Connect CloudFlare
Log in to the CloudFlare platform and select the Workers and Pages feature. On the right side of the page, click Create application
- Select Pages
- Connect to Git
- Select the repository you just forked
- Begin setup
- Save and deploy
After that, wait for the deployment. Once the deployment succeeds, you will get an address — if the deployment succeeded, this address is the upload page.

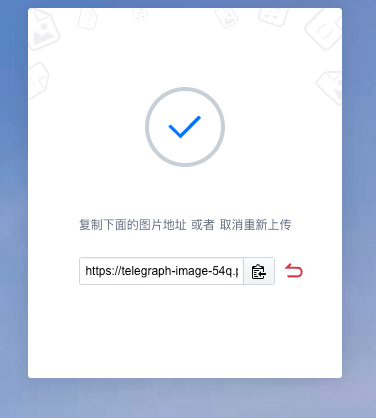
Test Upload
Testing the upload feature is simple: take any image no larger than 5M, upload it, and you should get an accessible URL.
Pro Version Setup
Compared with the basic version, the pro version mainly adds configuration options and integration with the PicGo client. The flowchart mainly shows the newly added features; for the basic features, refer to the basic version flowchart.
Configure Management Features
The supported management features mainly include three items
- Enable the admin panel
- Support image management features
Enable the admin panel
In the CloudFlare deployment dashboard, go to Settings -> Functions -> KV. We need to configure a KV pair here
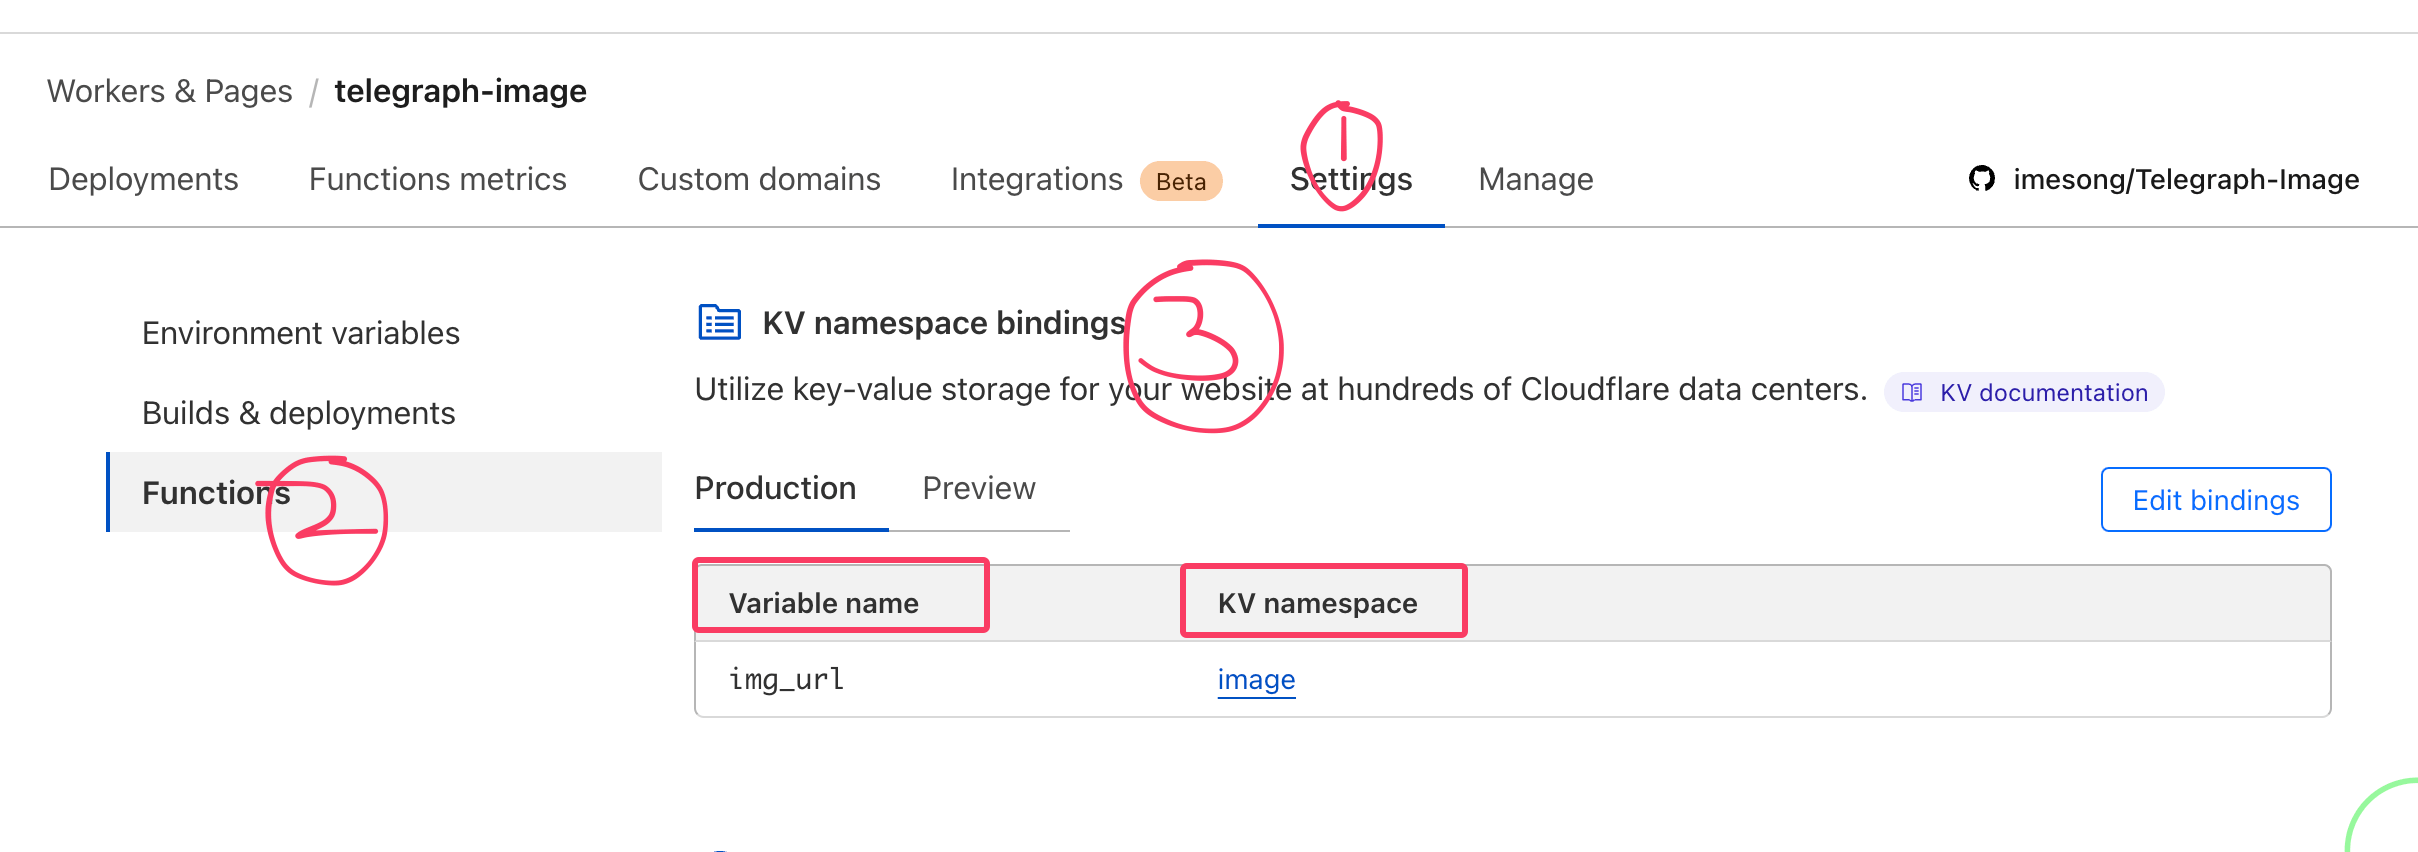
- img_url: the variable name.
- image: the namespace under KV. If none is available, you can create a new one.
Once done, append /admin to the deployed URL to enter the admin panel, e.g. https://img.imesong.com/admin
Add login authentication to the admin panel
If the admin panel has no access control — not even basic login verification — it’s like leaving the back door of your house wide open, which feels uneasy. Enabling login verification is simple: just add two configuration entries. In the CloudFlare deployment dashboard, go to Settings -> Environment variables
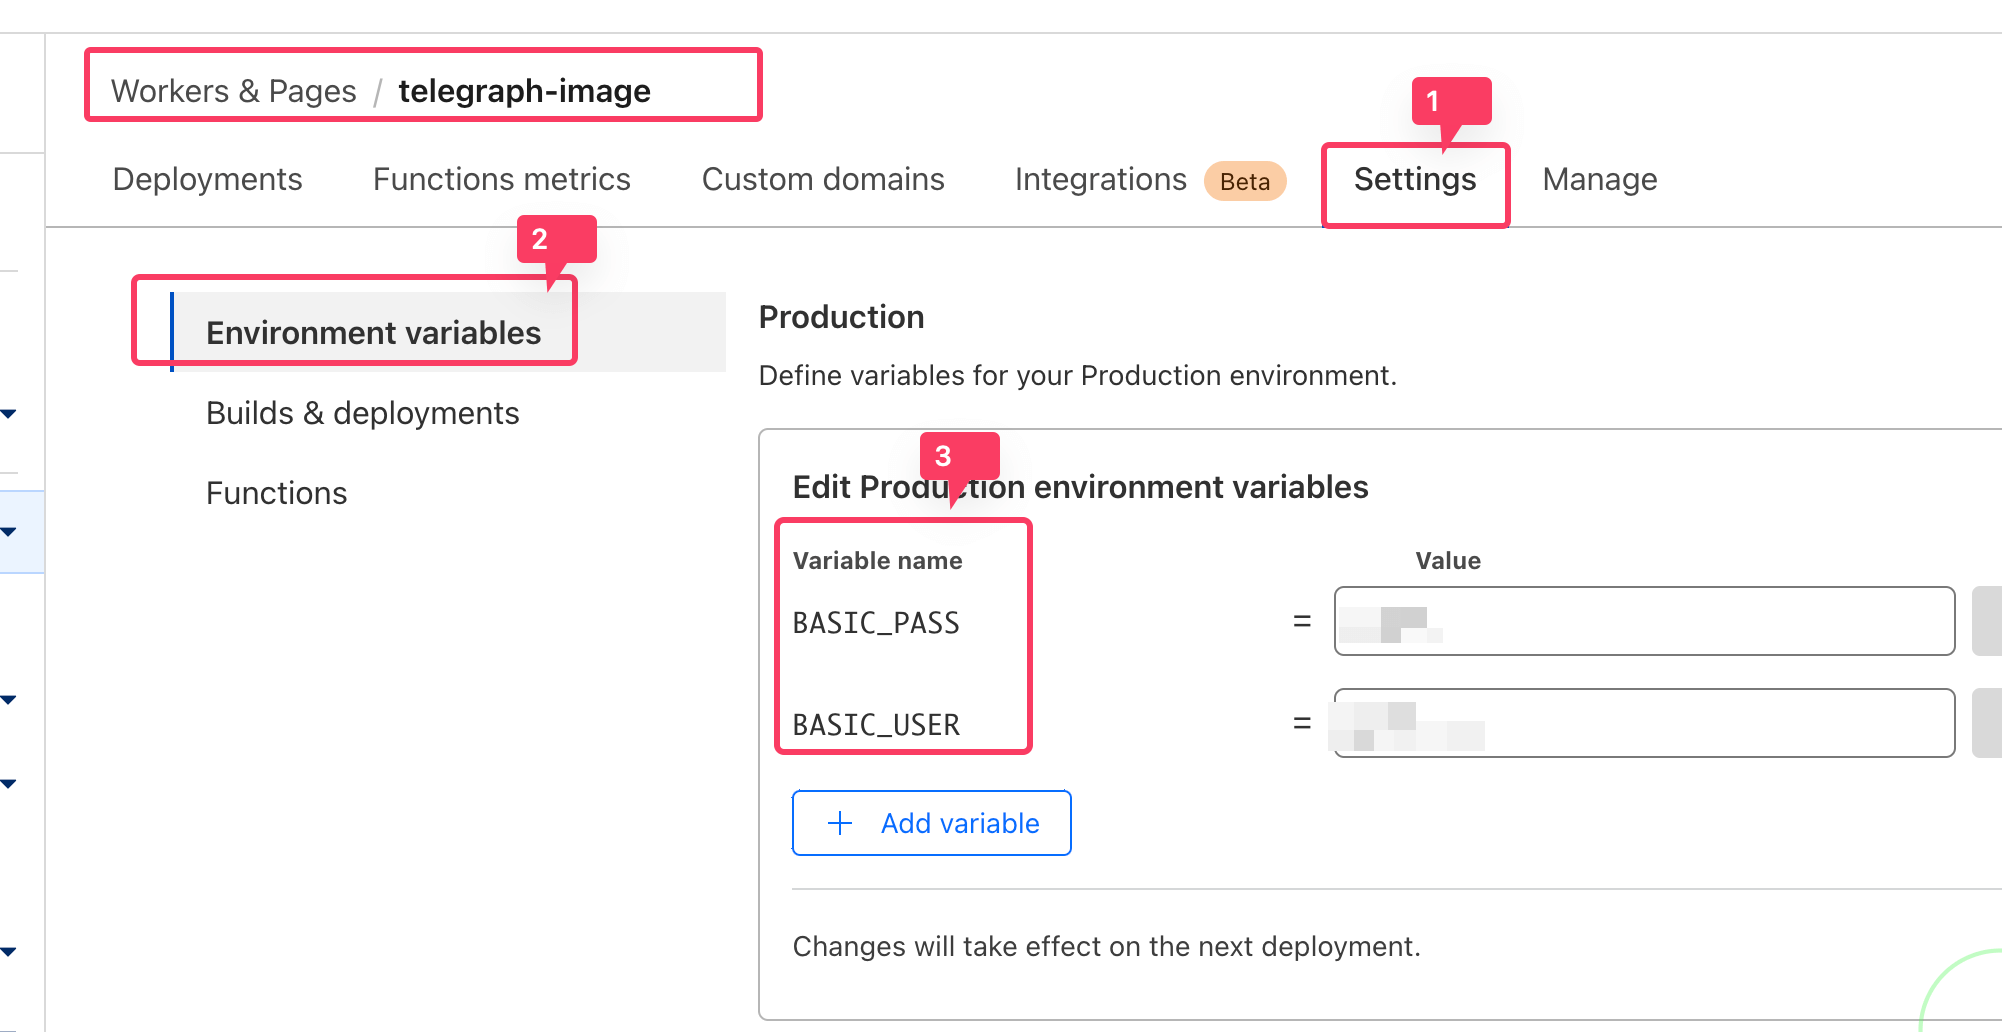
The two new variable names
- BASIC_PASS: password
- BASIC_USER: username The value after each is what you need to enter when logging in. After the admin panel is configured, it looks roughly like this
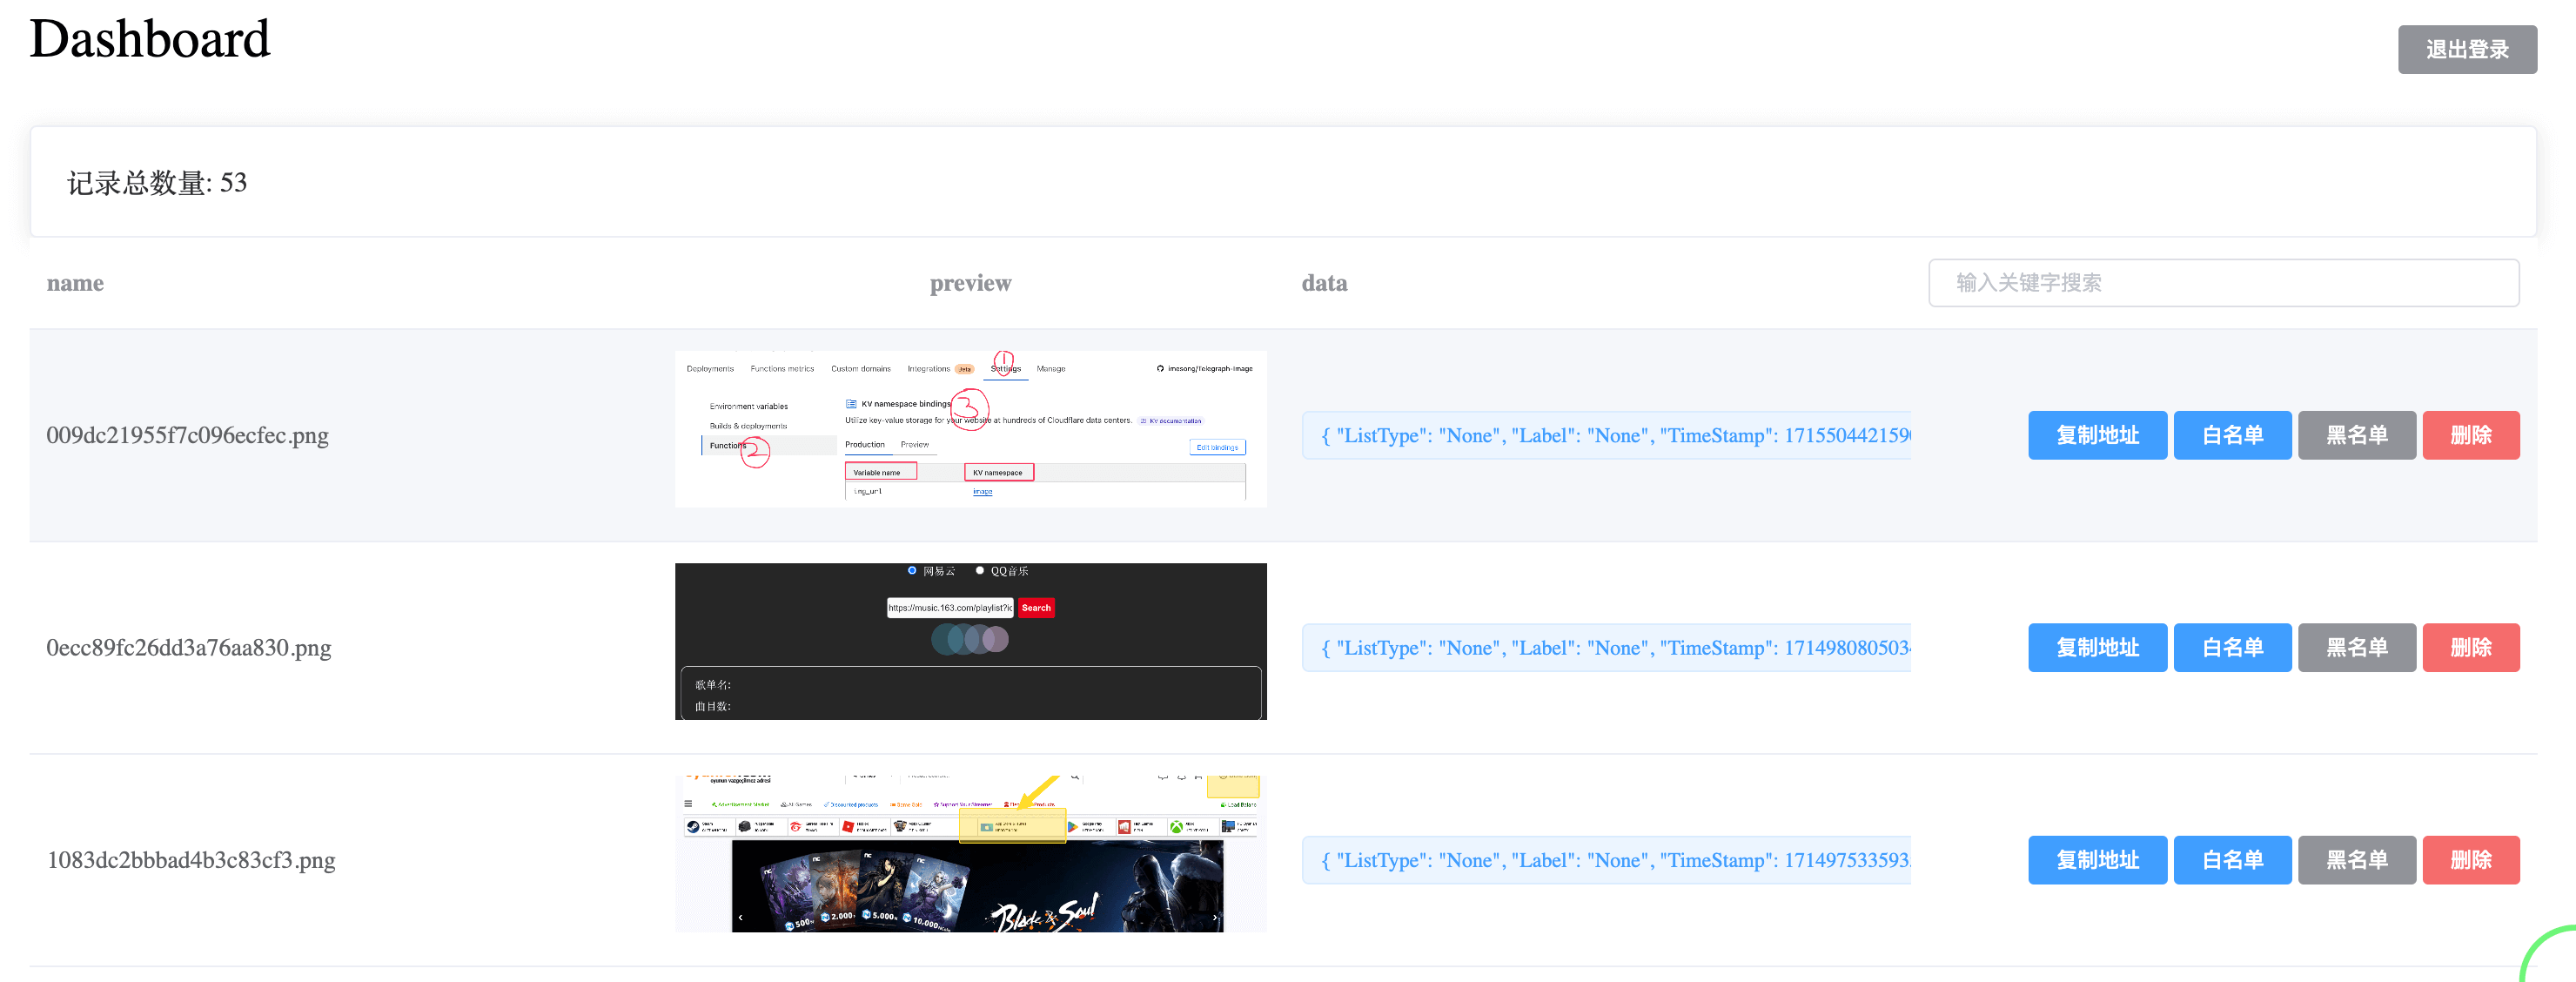
Custom Domain
After CloudFlare deployment completes, a usable domain is assigned automatically. If you want to use your own domain, you can configure DNS to point to your domain. Custom domain configuration is the same as ordinary website DNS resolution, so the specific rules are not repeated here.
- CNAME: add a subdomain pointing to the address generated after CloudFlare deployment. It takes effect in about 5 minutes.
PicGo Client
[PicGo](https://github.com/Molunerfinn/PicGo is an image upload client with a rich ecosystem of third-party plugins. This section introduces how to configure a custom image host in PicGo to upload images to the platform we just set up.
Install the PicGo client
The PicGo client can be downloaded from GitHub — download the latest version — then double-click the installer to complete the installation.
**Install the telegraph-image plugin
PicGo supports many image hosts by default, such as Aliyun, Tencent Cloud, Qiniu Cloud, etc., but the one we built is different from these existing ones — we need to install a third-party plugin and configure a custom image host. After installing the plugin, the configuration is simple: just fill in the URL for uploading images.

PicGo also has many other useful plugins; see more PicGo plugin recommendations
Auto-Upload Images to the Image Host in Obsidian
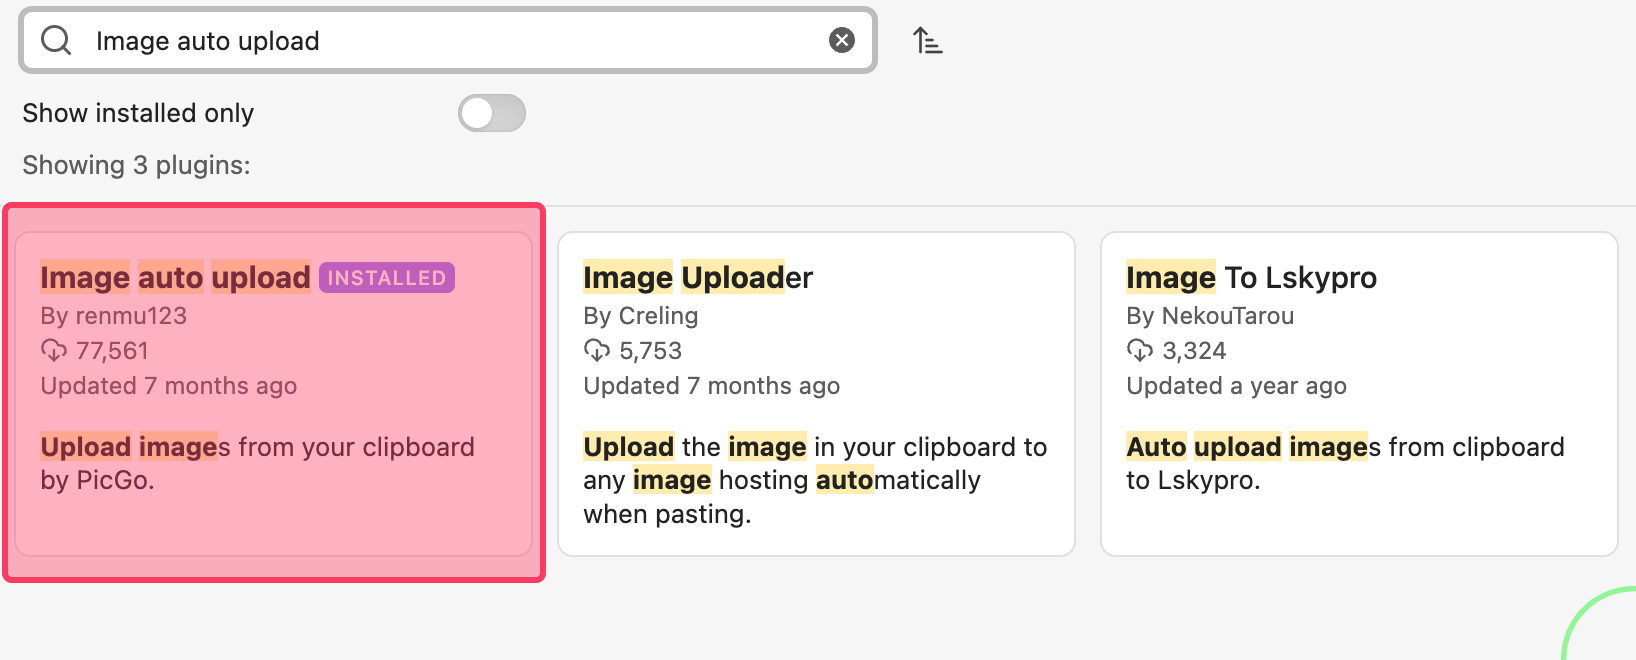
If you habitually use Obsidian for editing text and taking notes, you can use the Image auto upload plugin together with PicGo to automatically upload images in your documents to the image host, making the writing workflow smoother.
- Open the Obsidian plugin marketplace and search for the keyword Image auto upload
- Install the plugin and enable it
- Configure the plugin: the default configuration works; the PicGo server port is 36677
Test Upload
- Single upload
- Clipboard upload
- Batch upload / folder upload
- Automated upload via the Obsidian plugin
After verifying the three upload methods above, the image hosting setup, configuration, and usage workflow are basically complete.
AI Summary
The following is an AI-generated summary of this post, for your reference
This post introduces how to build a free image hosting service with CloudFlare Workers, and how to pair it with PicGo and an Obsidian plugin to simplify image management and automate uploads — solving image storage and management for a blog.
Follow the WeChat public account Tech Backyard for more information